This post may contain affiliate links. If you use these links to buy something I may earn a small commission at no cost to you. Thanks.
…
(To start, my apologies for lack of progress photos and the quality of others. I wasn’t really thinking about this as a post until well after I had finished.)
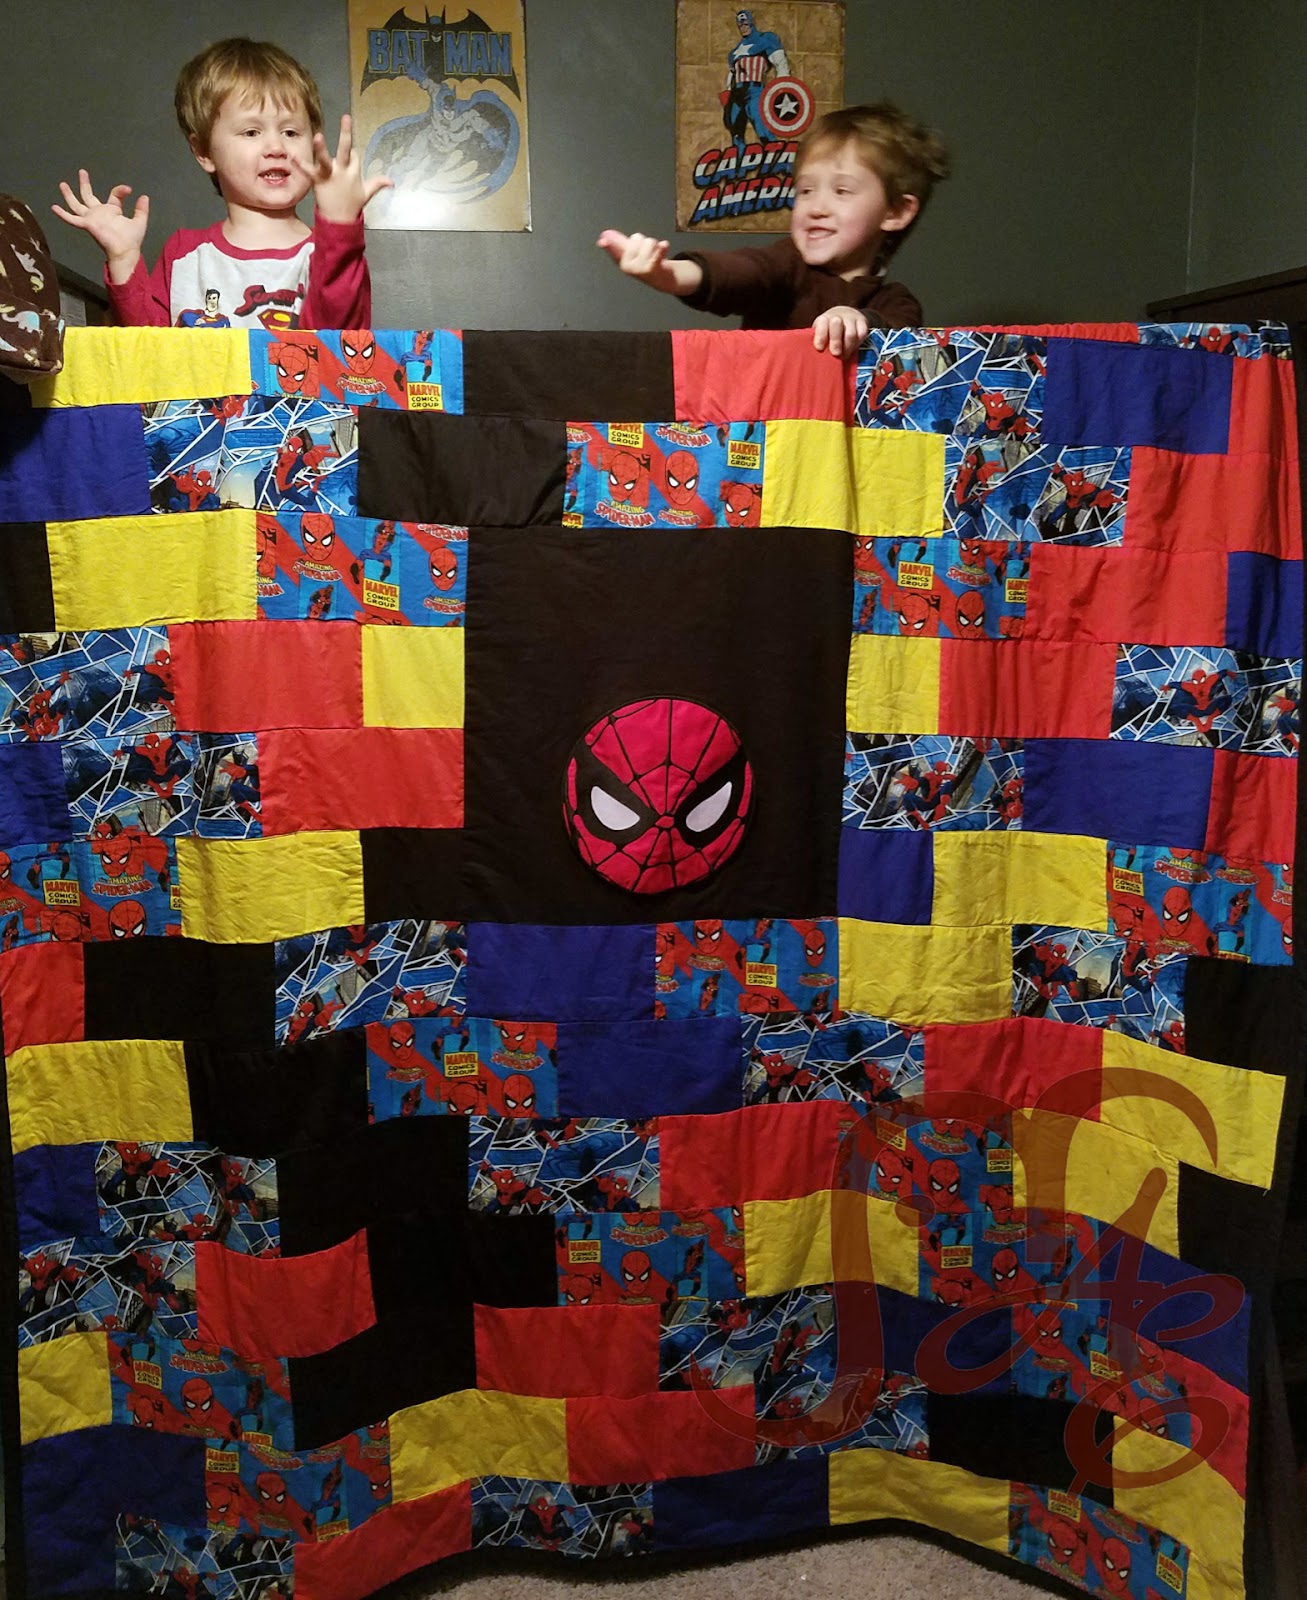
My sister-in-law and I were in Hobby Lobby one day (not unusual) when I found these two large superhero appliques on clearance. I had no idea what I was going to do with them but for only a couple of dollars I knew the boys would love them in some form.
Then I decided that I wanted to make the boys quilts. I love crocheting but the thought of making a bed-sized blanket made me want to cry. My very first quilt was a 9-block scrap pattern that I made when I was a teenager, and with quite a bit of help from my mom. And I had someone else quilt it. It’s wonderful but was definitely not my finest work, go figure. Since then I’ve made a couple of baby-sized quilts that I quilted myself. But they weren’t too difficult since they were small. I wasn’t sure if I could tackle a twin-sized blanket.
My mom is a seamstress and a really good one. She’s made dozens of quilts but usually has another lady who does the backing and quilting for her. I still have the one she made for me when I was little. The one problem that I’ve always had with quilts is how stiff they can be, especially when they are new. They just aren’t as cuddly as an afghan or fleece blanket. But they are always nice and heavy. So…dilemma…

On with my story…. I wanted to make the boys their own quilts for Christmas. I had been planning on it for a while but, like usual, kept putting it off. I was buying fabric a few yards at a time since I knew I was going to need quite a bit to make 2 twin-sized quilts. I also knew that I was not going to get them done in time to send them off to be quilted. (Also, I really didn’t want to pay for it. Those quilters are phenomenal and make beautiful patterns but are also kind of expensive.) So I came up with a plan. The baby quilt I had made before was in strips and I quilted it to the backing as I sewed each strip together. (Something like this tutorial here.) It was pretty simple and turned out great! I didn’t want to do a twin-sized quilt exactly like that though, since my fabric wouldn’t have been wide enough to go across in one piece due to the print direction.
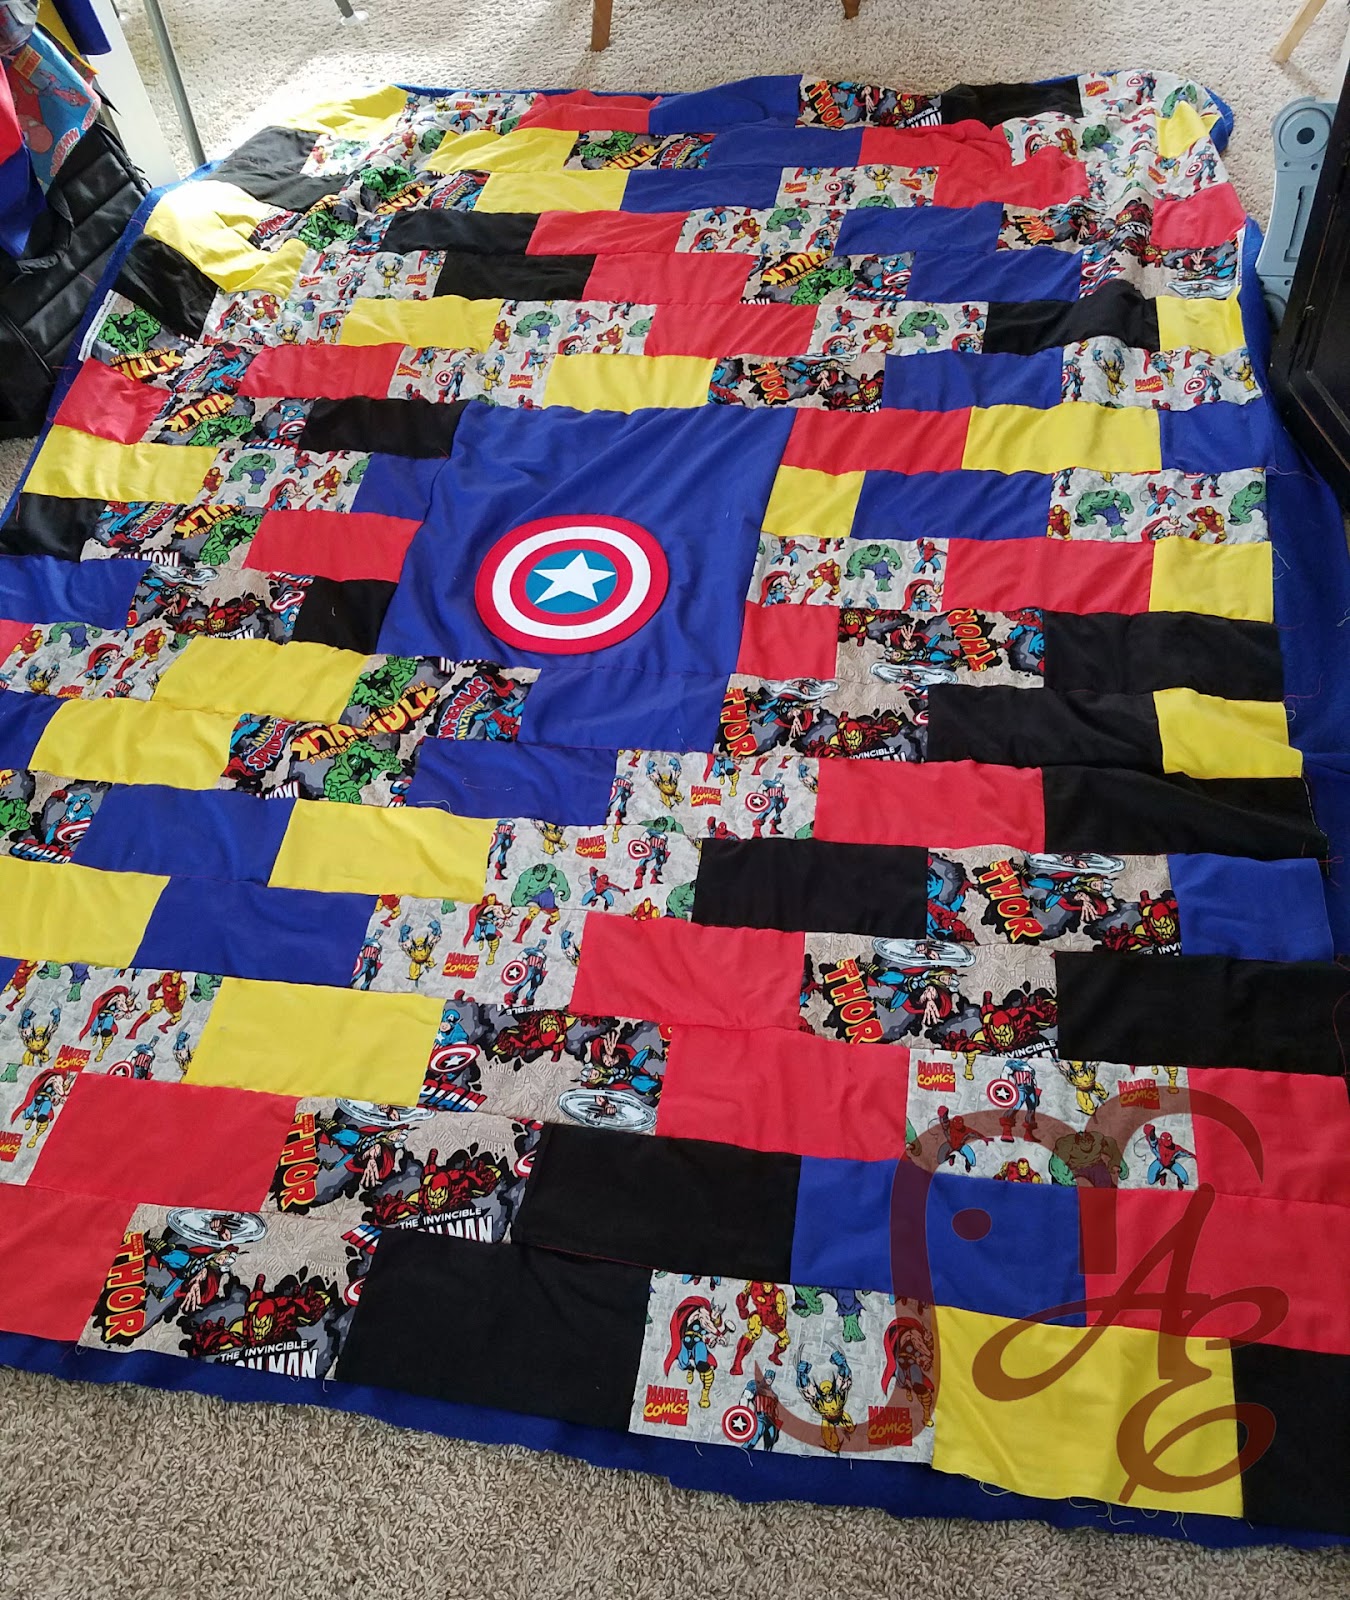
I decided to go with a brick design. I thought it would be easy to cut out that way and could still be sewn together in rows and hopefully easy enough to quilt across. I looked up the size of a standard twin quilt.
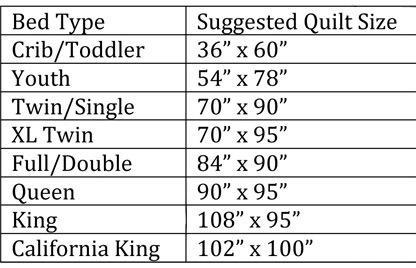
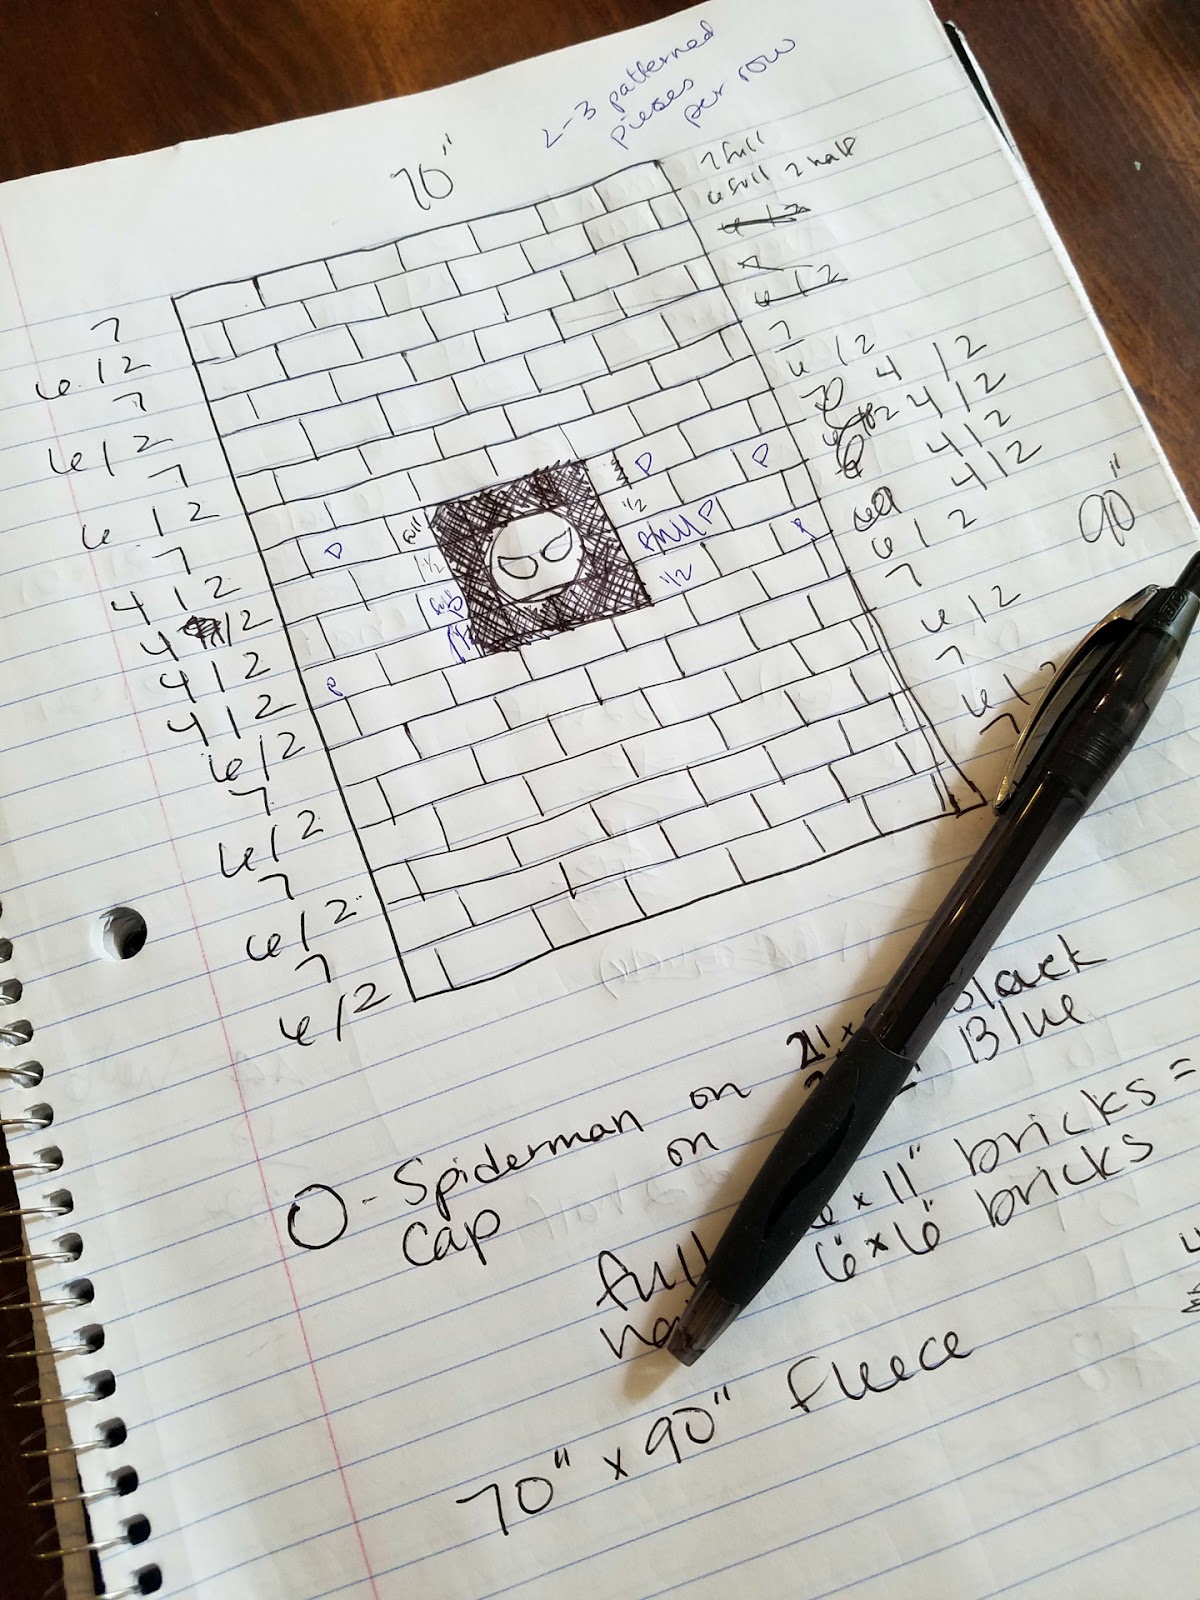
I found that a 70” x 90” blanket would let me cut out full bricks that were 6”x11” and half bricks that were 6”x6” (I allowed for a half-inch seam.)
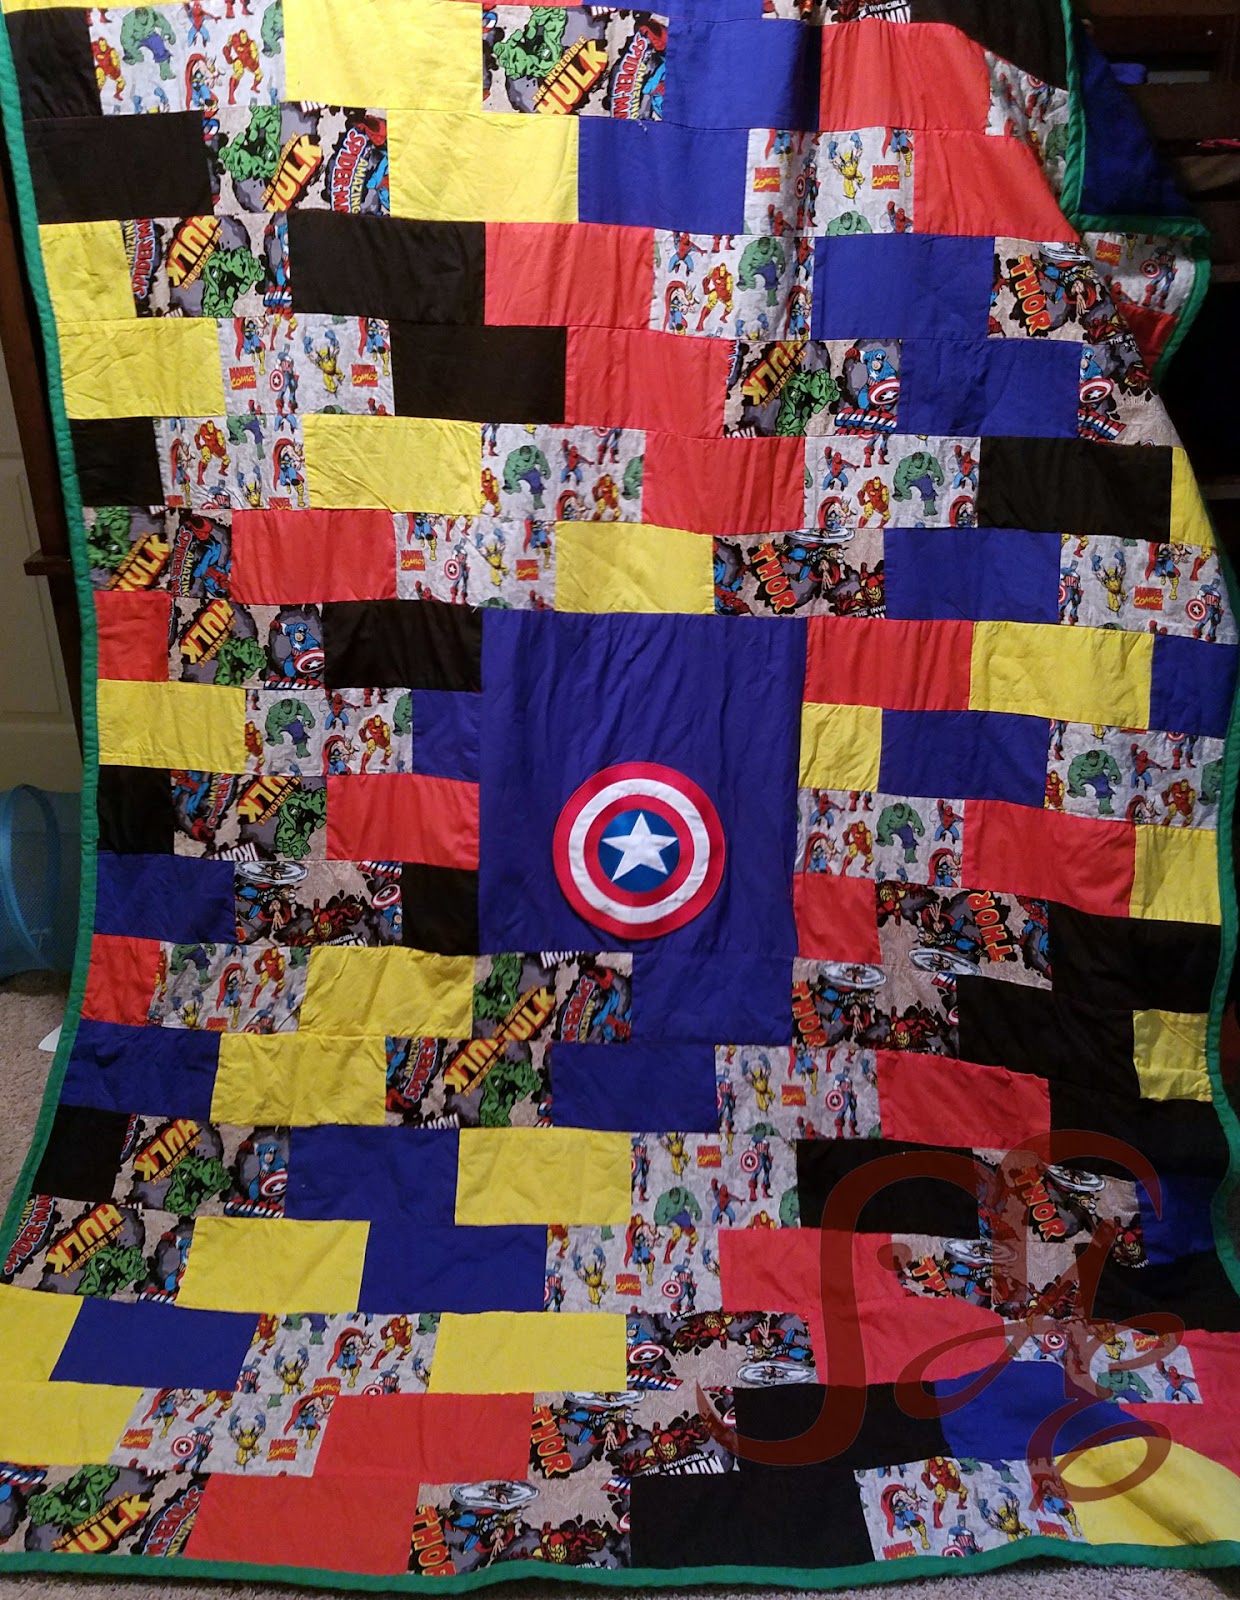
Now, what did I do with those big appliques I mentioned earlier? Well, I decided to make a large block in the center to put those on and then personalize with each of the boys’ names. It took a little bit of sketching and a whole lot of calculating but I was able to get the numbers all worked out. I cut a 21”x21” square for the center section. This meant I needed 7 rows of 7 bricks across and 7 rows that had 6 full bricks and 2 half bricks. And 8 rows that had 2 full and one half to go on either side of the large block.
Total Blocks cut:
6” x 11” – 107
6” x 6” – 22
21” x 21” – 1
I cut a random assortment of patterned pieces and coordinating solids. I tried to make it even without having to put too much thought into it. I was able to use most all of the yards of fabric that I had without a lot of excess which made me happy.
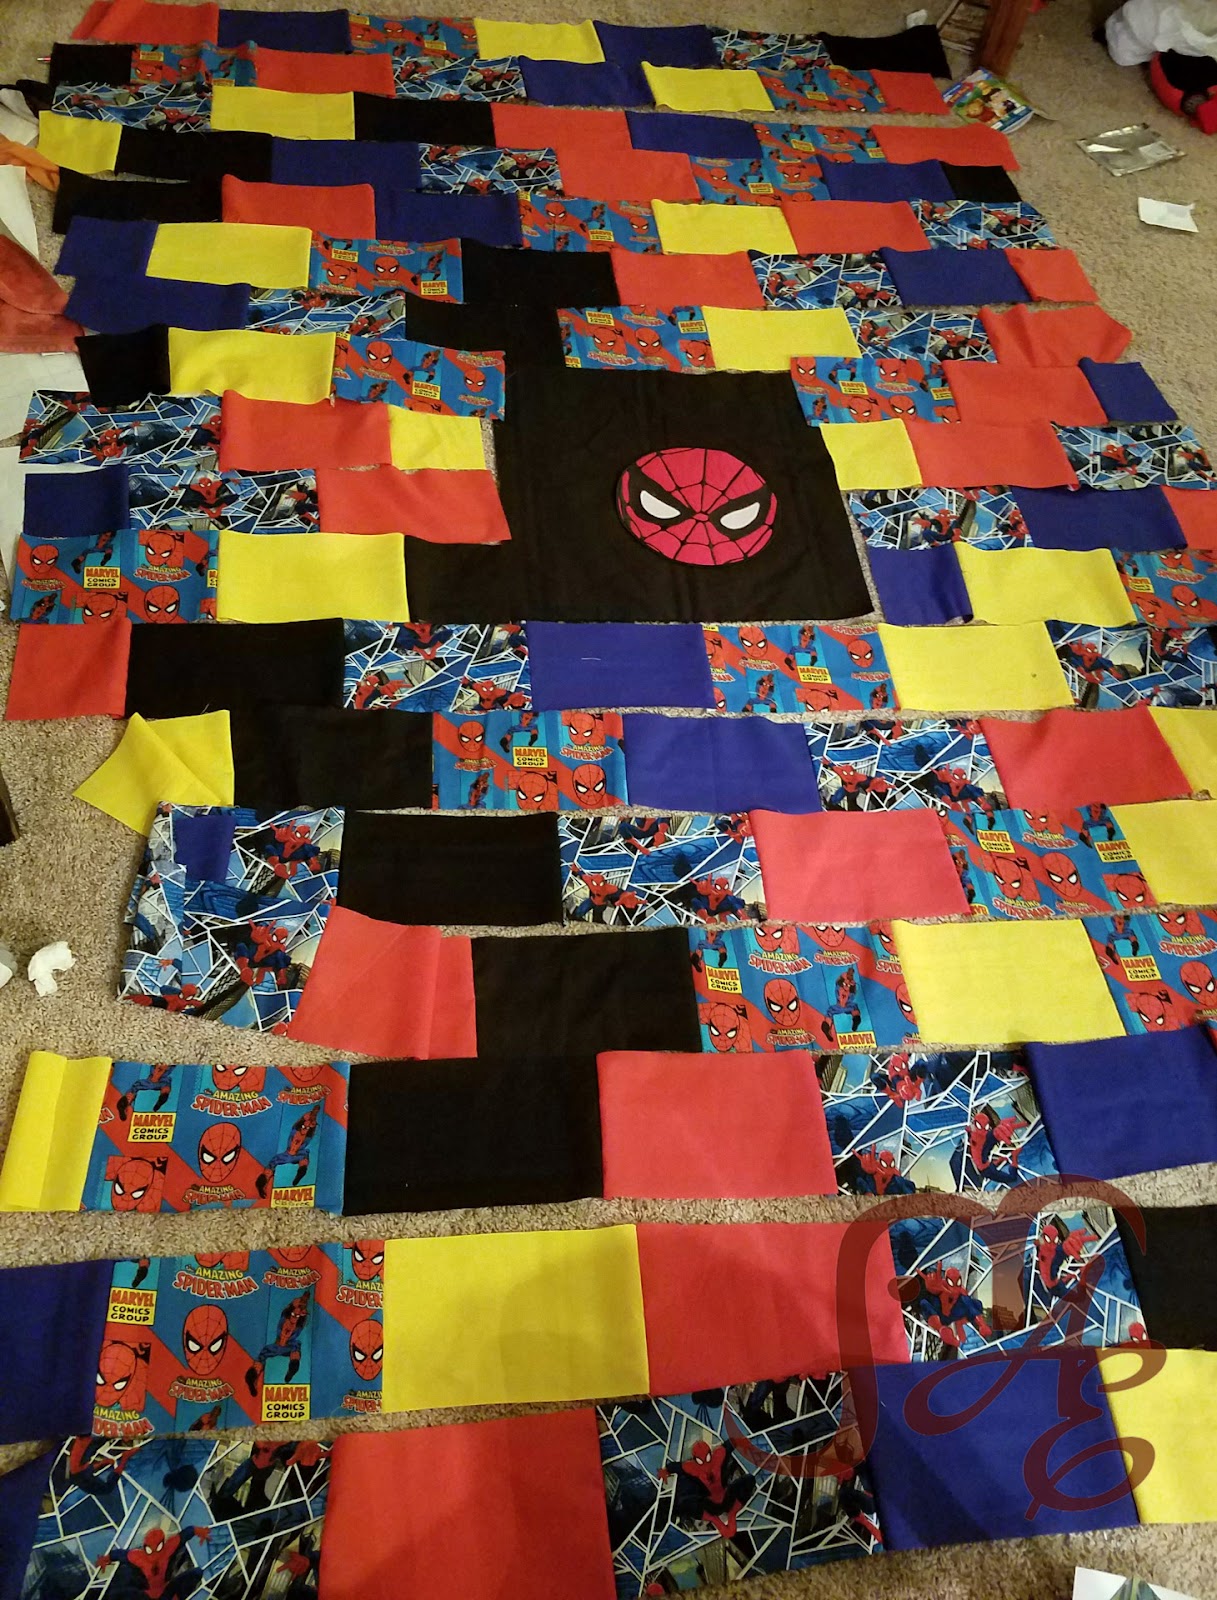
I sewed the applique onto the large center square, a little lower than center so that there would be room for a name above. (I have not actually put names on as of yet because I waited to see which boy would like which blanket. It’s super hard to judge at this point since they change their minds so much. I have plans now to just hand sew on their names, or maybe see how long the Iron On ones will last.)
Then I started to sew the rows of bricks. I grabbed a random pair of bricks and sewed together the short ends until I had a long strip of bricks. I found it easiest to do all of the 7 brick rows at once, making a tick mark in my notebook to keep track of how many I had. Then all of the 6 full, 2 half rows (A half block goes at the beginning and end of the row, giving the blanket that brick pattern.) I needed 4 rows that went half-full-full, and 4 rows that went full-full-half for the short rows on either side of the center block.
When I had all the rows sewn together, I laid them all out on the floor. Since the bricks were random there were some odd groupings that I tried to even out as best I could. But I tried to just go with it.
I took the 4 short rows from the left side of the large block and sewed them together. Then did the same with the 4 rows to the right. Next, I took those and sewed them on either side of the large block. The center chunk is together now! Yay!
Then just start putting together the other rows. I actually took that center chunk and built up from there one row at a time, and then back down. You could also sew the 7 rows on top together then attach to the center and so on. I think I actually ended up doing it both ways, I don’t think either is really better than the other. Once that is all done, you have the top of your quilt! WOOHOO!
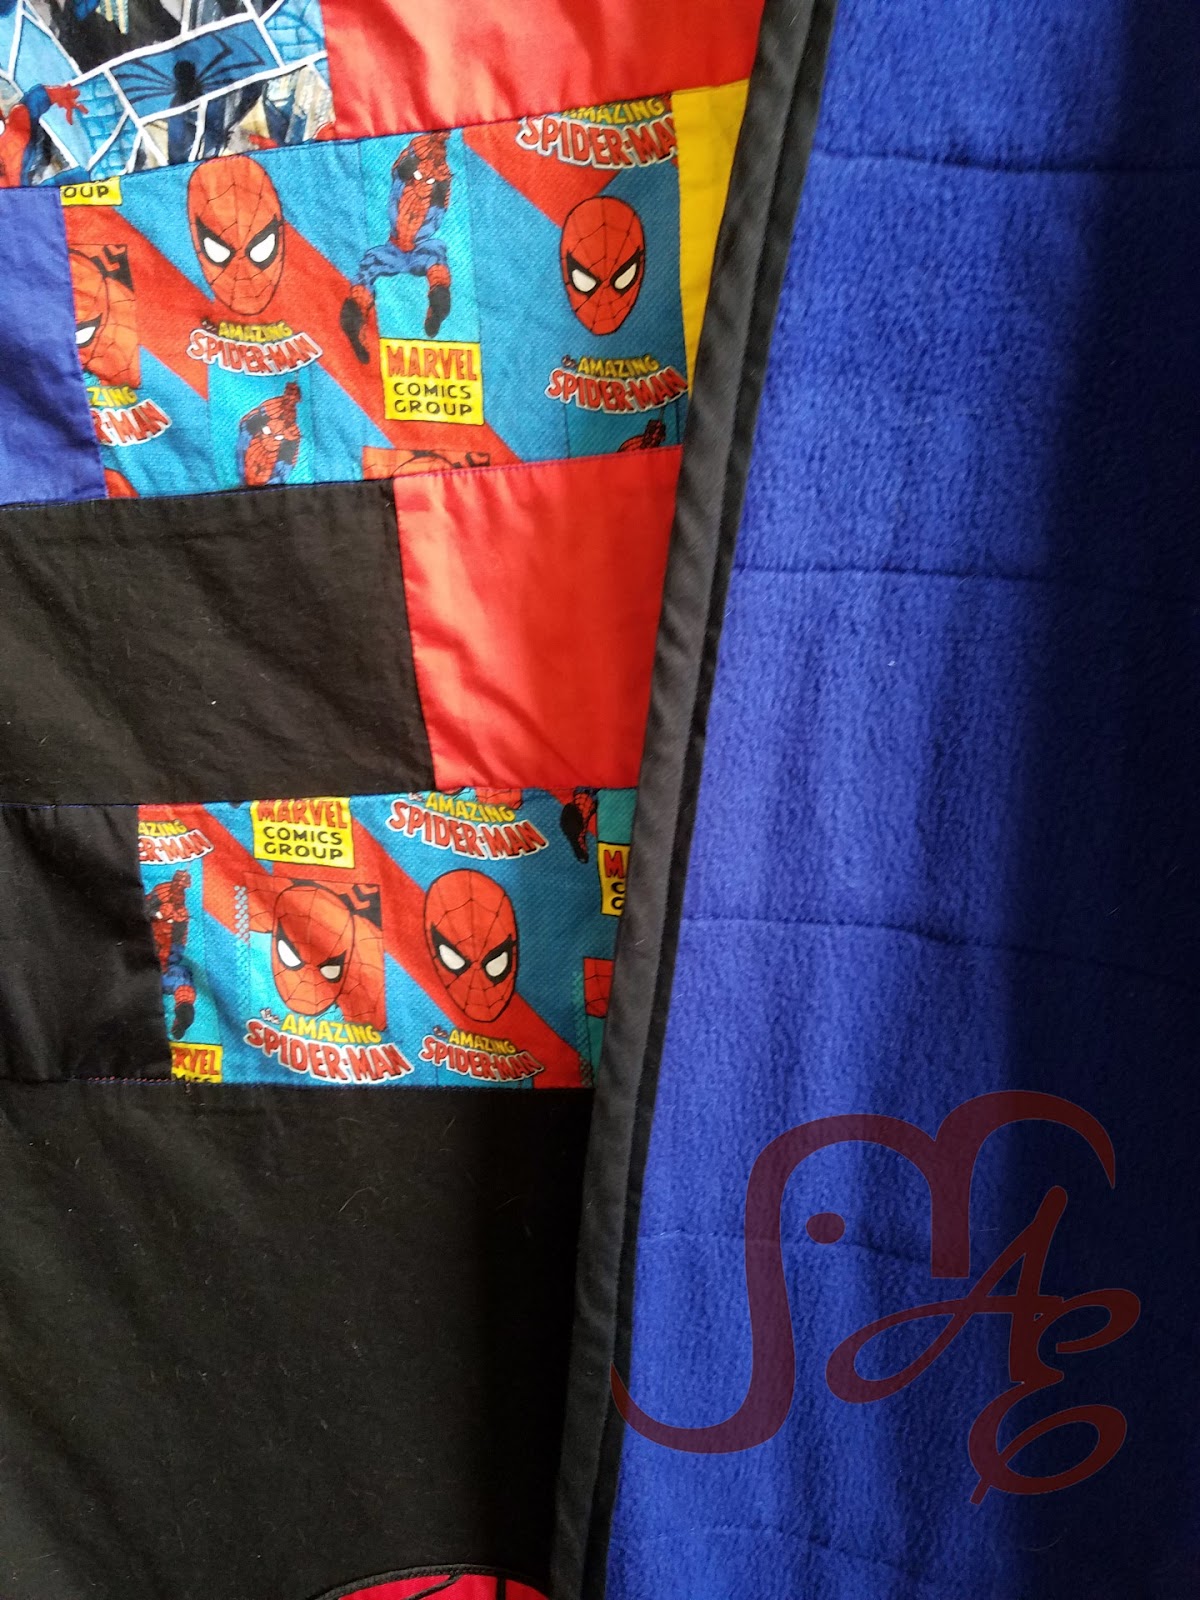
Now for the backing. Like I said earlier, I don’t really like how stiff quilts can be (from the batting, mostly). I wanted to find a way to make these softer and, of course, easy enough for me to do myself. I decided to use fleece and no batting. I hoped that it would make the blanket softer and less stiff but still warm. I needed 4 yards of fleece for each blanket. I believe the standard fleece is 60” wide so I had to piece it together. I cut my 4 yard piece in half and sewed the halves together to make a large piece that was 2 yards wide (72”) by 120” long.

I laid the fleece piece out, seam up, and placed the quilt top on it, right side up. (The wrong sides will be together.) Then pinned away! I actually found it best to start in the center where the large piece was so that the fabric was centered and doesn’t get stretched or wrinkled. After everything was pinned together (as well as I could anyway because pinning is the worst) I trimmed off the extra fleece from the end. (I lined the top part of my quilt up with the top of the fleece, which left enough of a section of fleece that I was able to make a simple pillow case to go with these new blankets! Waste not!)
From here I rolled up each end so that they met at the top of the large block. I took this over to my machine and got started. I was surprised that this worked as well as it did even though it was a little cumbersome dealing with the bulk of the blanket. But I put the slightly smaller roll to the inside of the machine and starting at one end sewed across the seam. The rolls actually made pretty decent handles to hold while guiding the quilt through the machine. On one of the blankets I used a thread color that matched the fleece backing so that it isn’t as noticeable that my lines aren’t straight. (I can’t sew straight to save my life) but that doesn’t really bother me. If it bothers you, I would just suggest going slower and staying right on top of the seam. Once I made it all the way across I unrolled the inside roll until I could get to the next row and then sewed down that one. And so on and so on until I reached the end. I made sure to roll up the other end at the same time. This made it so the bulk of the blanket was much easier to manage and feed through without pulling off to the side. A good thing to note is that I sew at my dining table where I have a lot of space around. This was especially helpful for sewing these blankets. Not as helpful when it comes to needing to actually eat dinner at the table….
After I sewed down all the rows from the middle to the top I went back down to that center chunk where the large square is. I didn’t want to sew across the open space, partly so my not-straight lines weren’t as obvious but also so that I didn’t sew over my applique. I just sewed down the line and then “jumped” over the center square and started up again on the same row on the other side.
Once I had all the rows sewn across I laid the blanket back out flat and squared off the edges, trimming off the extra fleece and uneven rows. I used pre-made bias tape as the binding around the edges. It took 3 packages (9 yards, I think) of the double fold bias tape. I have never had great luck making my own bias tape. It’s annoying and feels like it takes forever. I’d rather pay for it and save myself the headache. After that was on I was all done!
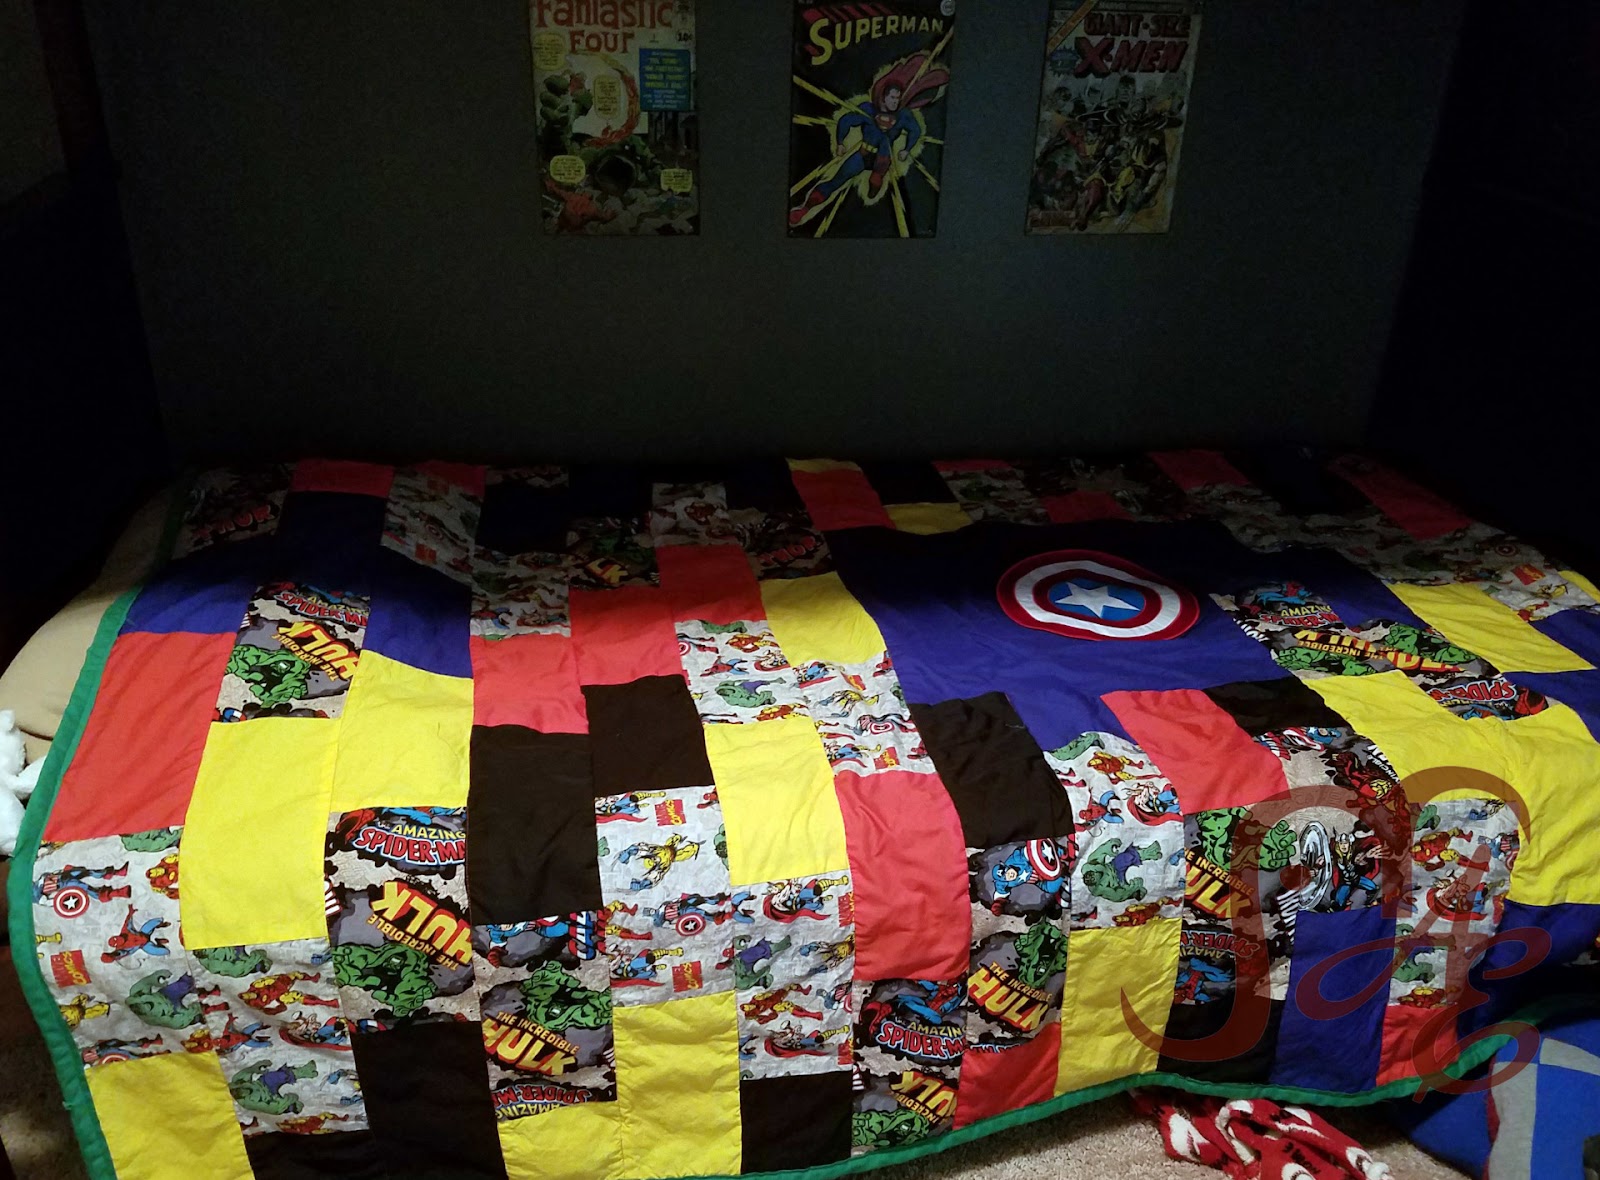
I’m pretty pleased with how these turned out. They are heavy like a quilt, but not too heavy. They are soft and warm without being stiff. And the boys loved them! The only thing that I dislike is that where I placed the large applique makes folding it in half kind of awkward since that itself is stiff. But I have had to wash one a bunch of times so far and I’ve noticed that has softened a bit too. And they are on the boys’ beds all the time so folding isn’t such a worry at the moment.
I’d love to make another one like this to fit on our queen-sized bed but I’m not quite ready for that. I think I’ll start collecting the fabric though!
If you give this a try, I’d love to see how yours turn out! I think I’ll try to make mine more patterned next time too.